Wall insulation

Table of Contents
Home Journey - This article is part of a series.
Shutters #
This was one of the first things I did on my home improvement journey. Having gotten hold of the building plans and NatHERS report, I noticed that our masonry block walls were insulated with something called Foilboard Ultra 20. Not knowing anything about insulation at that time, I looked it up, it sounded great. 20mm of EPS (styrofoam) with a reflective foil face on both sides. They claimed an R value of about R2.0 when installed with an adjacent air cavity.
So when I realised that our openable shutters were uninsulated, I immediately thought to use Foilboard for consistency with the wall below.
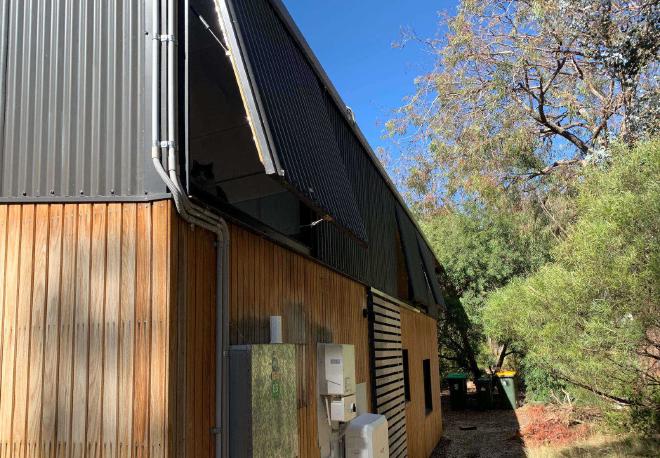
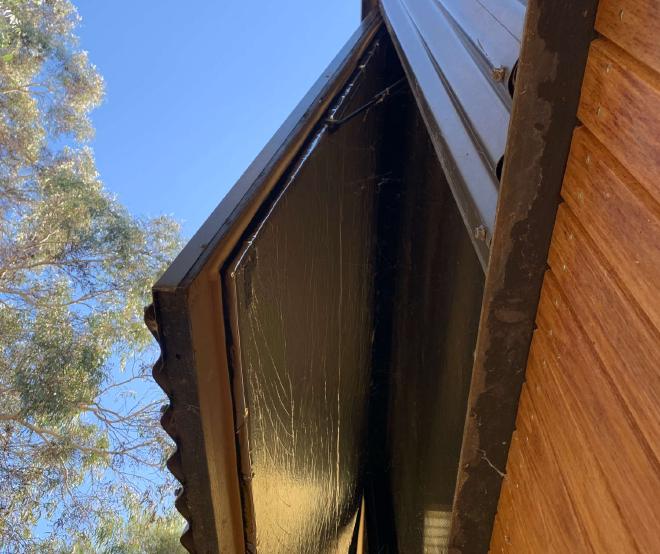
The west side of the house has 2.4m-high masonry block walls (timber clad), and then 1.5m-high shutters above. It turns out that these shutters are simply standard doors with steel cladding. No insulation.
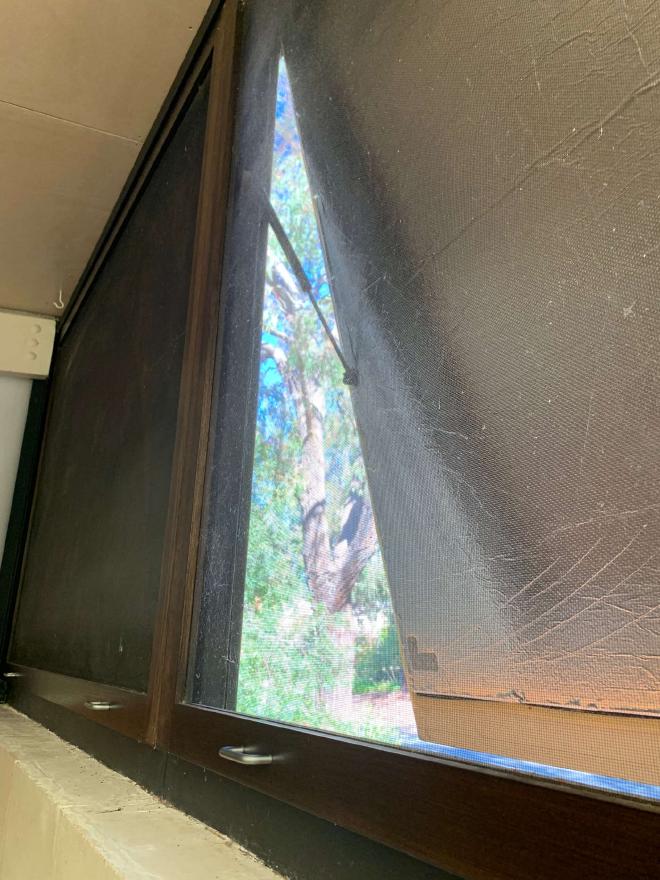
There was only about 40-50mm clearance to the internal flyscreens. So my plan was to mount 20mm Foilboard with a 20mm air cavity behind (cavity spacers made of the same Foilboard material).
In the end I was worried that the panels with an airgap behind could be damaged easily, so I only made an airgap on fixed (non-openable) shutters. For the openable ones I directly fixed a single layer.
Knowing more about insulation now, I would do this differently. I know that 20mm of EPS only has an R value of ~0.5. There are better materials such as XPS. Still, something is a lot better than nothing.
Masonry walls #
When I figured out that 20mm Foilboard is actually not great for a wall, I thought I should do something about the masonry block walls that have this as their insulation.
These masonry walls are all along the east and west sides of the house. On the west: study, master bedroom. On the east: family, bedroom 3. They are core-filled blocks exposed internally. In winter they are cold to the touch. So if nothing else, covering them with an internal layer would improve the mean radiant temperature.
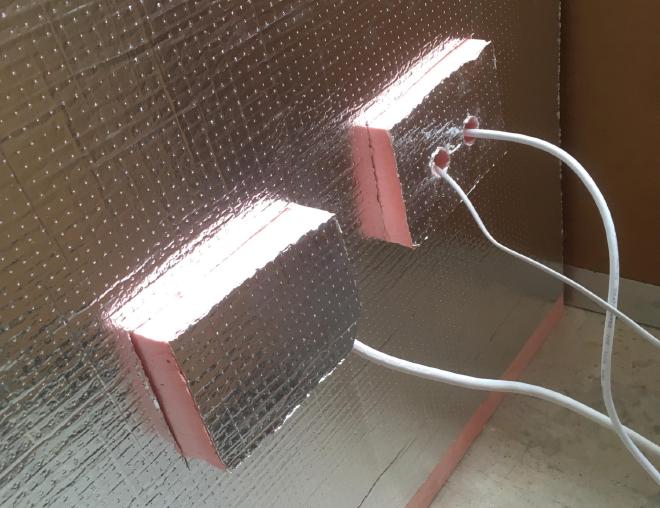
The external timber cladding blocked the exterior. I did not want to attempt to take that off. So I decided on internal insulation. I wanted to minimise the loss of internal space, which meant I needed a highly insulating material. The best I found was Kingspan Kooltherm K10, a rigid phenolic insulation board. For 60mm thickness these have a declared R value of R2.75. I bought 10 boards, a total of 28.8m2, for $1957+shipping (oof) from Pricewise Insulation.
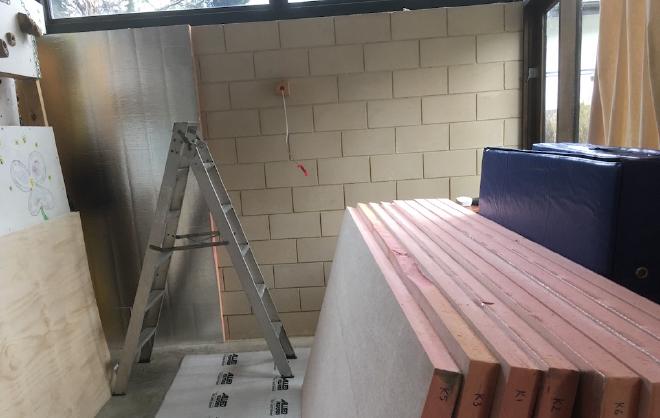
Conveniently, the walls are 2400mm high which is the height of the boards. I taped the joints with reflective tape.
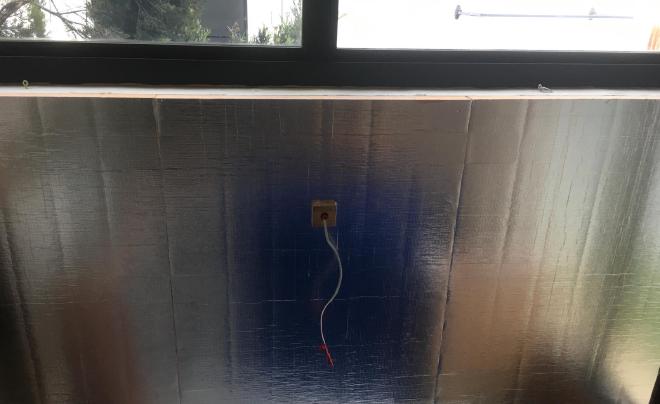
I even tried to avoid cold leakage through power and data outlets by making insulation plugs. A bit silly really considering how many other thermal bridges there are in the house.
The wall in the study I lined internally with an acoustic pinboard, i.e. 9mm polyester, with aluminium edging.
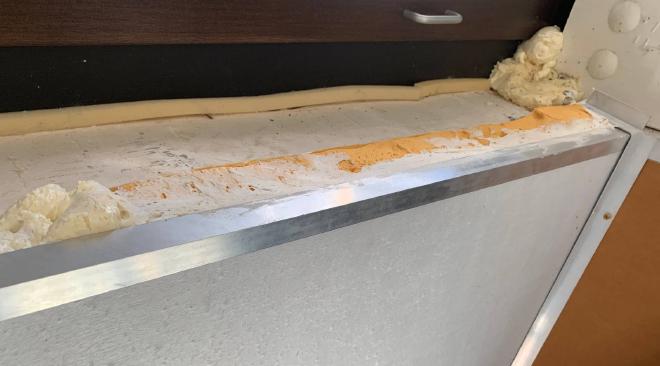
The walls in bedroom 3 and family room I lined with whitewashed 3mm plywood. I also insulated the tops of these walls with offcuts of EPS and Kingspan, and spray foam.

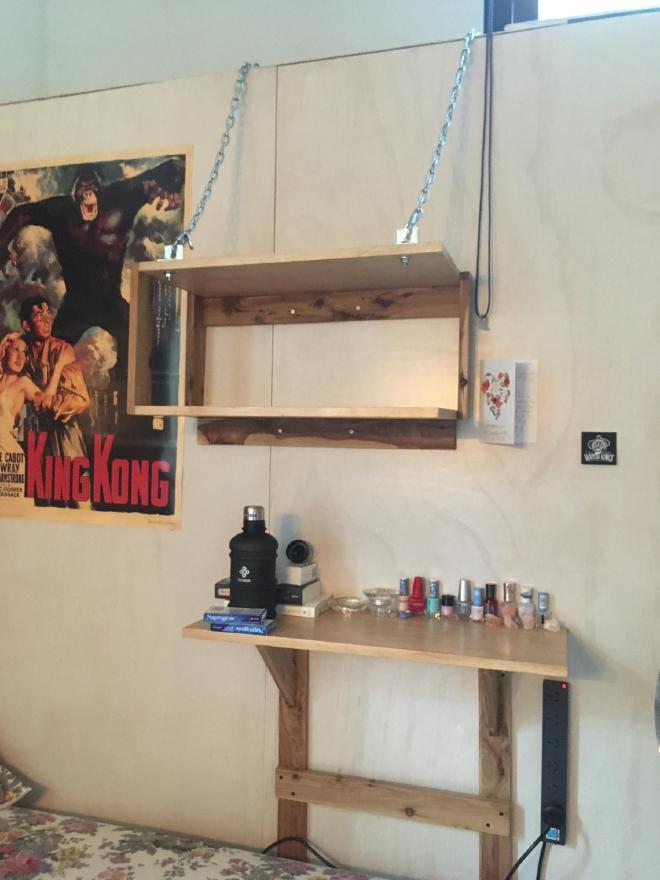
One problem with internal insulation is that it is a soft material so it won’t hold fixings well. You have to be creative with things like shelves.
The master bedroom we decided to leave as exposed masonry blockwork. This room is effectively zoned off from heating (with an automatic door closer).
Excess windows #
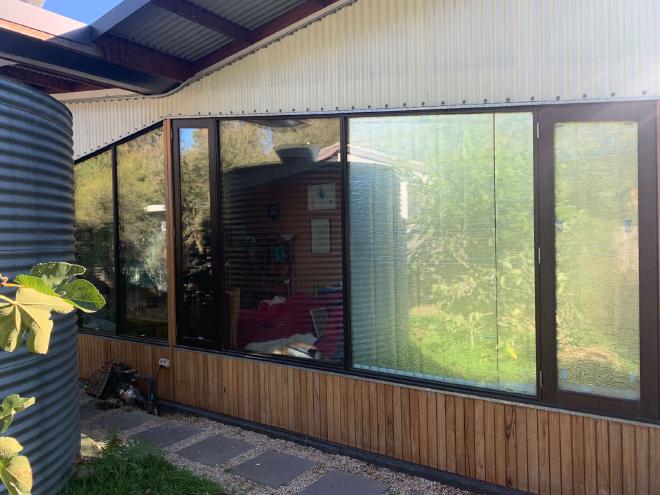
If you believe NatHERS modelling, windows are the greatest weakness in our thermal envelope. We have a lot a windows. Of course, the north-facing windows give us solar gain (and lovely direct radiation) in winter. But the south-facing windows do not. I therefore decided that it would be better overall to convert some of the south-facing windows to walls… i.e. to insulate them.
The family room has 9 south-facing windows with a total area of about 19.5m2. I deleted (in a design sense) 3 of them: ones at each edge of the south wall. Those edges were anyway occupied by curtains, so the loss of viewing area is less than it sounds.
I used the same high-performance phenolic insulation boards as I used on the masonry walls (see above).
The 60mm-thick boards were able to sit within the window reveal. They did not have to be fastened. In fact, the fit was so tight that I included a strap wrapped around the boards to allow them to be pulled back out if needed.
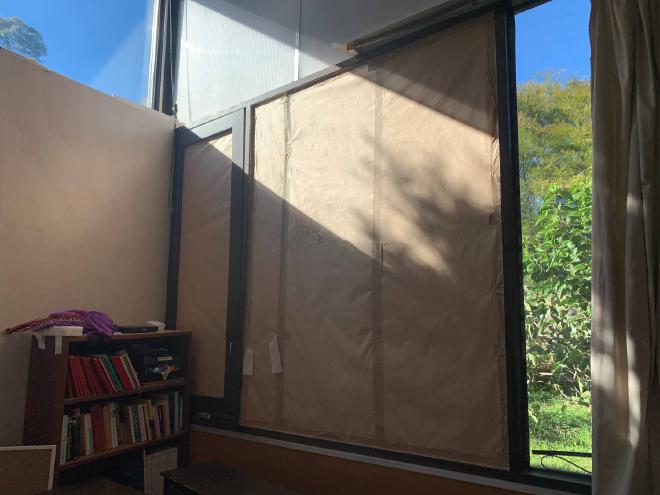
For a while we just left this with a kraft paper covering even though it looked pretty daggy. Then when I ended up with some offcuts of plasterboard from building my workshop, I decided to finish the job. Plasterboard can be bonded to the insulation effectively with foam adhesive. I did not use any fixings.


I did the same with the window at the other end of the room, not shown.
One other window was deleted: one of the two high east-facing windows in Bedroom 3. (The fixed pane; the other one is openable.) That one I lined internally with acoustic pinboard, i.e. 6mm polyester. Importantly, being east-facing, this window gets direct sunlight. If an insulation board was placed there, the double-glazed window pane would heat up like a solar oven! So I made sure to hang shade cloth over the external face of the window. At our latitude, and with the roof eave, the south-facing windows do not get direct sunlight.