Foundations

Table of Contents
The Pea Hut - This article is part of a series.
Foundation system #
My vague understanding of raised timber floors was that they needed timber posts set into the ground, or brick piers, both of which sounded like a lot of work and how do you get them all level? It was therefore wonderful to discover the foundation system of Oakwood Garden Rooms.
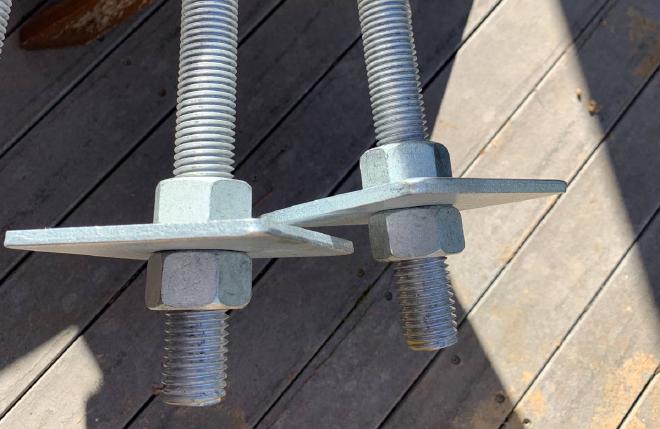
The basic idea is to use threaded rods to hold up the timber floor frame. The beauty of it is that you can get the levels right after it is concreted in, simply by moving nuts up and down the threaded rods.
Ground works #
I marked out the site by measuring from block boundaries, deciding which direction the building would face, and measuring a square. I also had to figure out what height I wanted the finished ground level to be and how this varied from corner to corner.
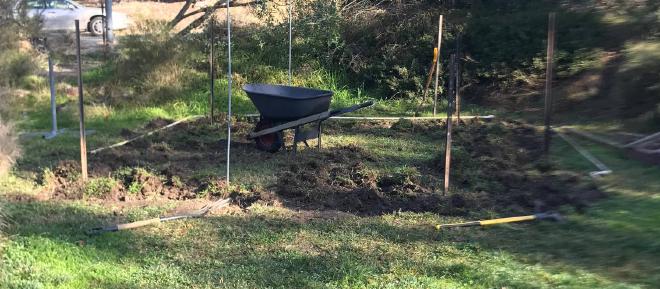
Marking out a square is surprisingly hard. I tried using a square-edge board, using the 3-4-5 method, measuring diagonals, but the method that worked best for me was the rope method (intersection of circles).
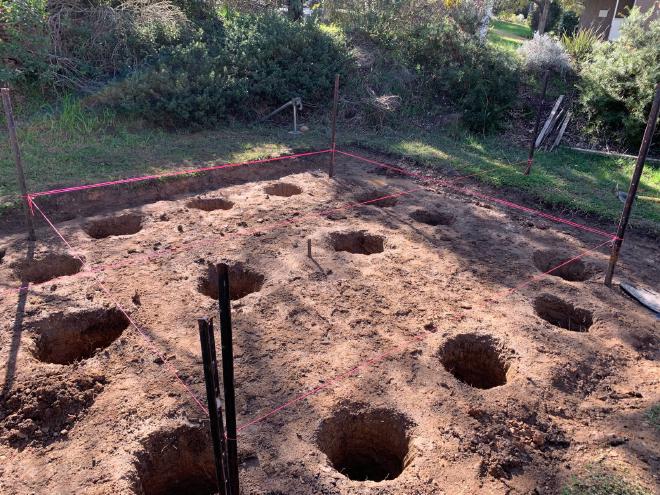
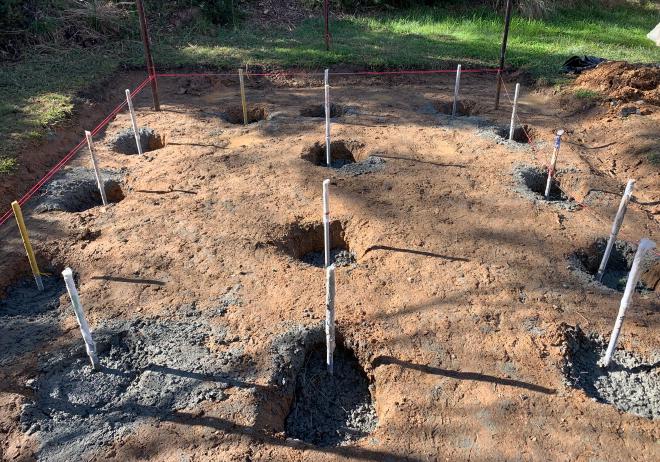
Once I had the string lines in place, I measured out locations for 3 foundation holes on each side and 2 down the middle: 14 total. I hired a two-man post hole digger for a day. It was a little scary because we kept hitting rocks and getting kick-back, but my 80-year-old mother was able to handle it opposite me. She’s pretty awesome.
I wasn’t happy with the depth of some of the holes so I finished them off by hand, getting them down to at least 600mm.
Drainage #
The ground should slope away from the building all around to keep the underfloor dry. Particularly since the floor beams had to be quite close to the ground (around 200mm) to stay within the height limit. Also, I did not want gutters on the roof for aesthetic reasons. So I dug French drains all around and ran a hose on it to test the drainage.
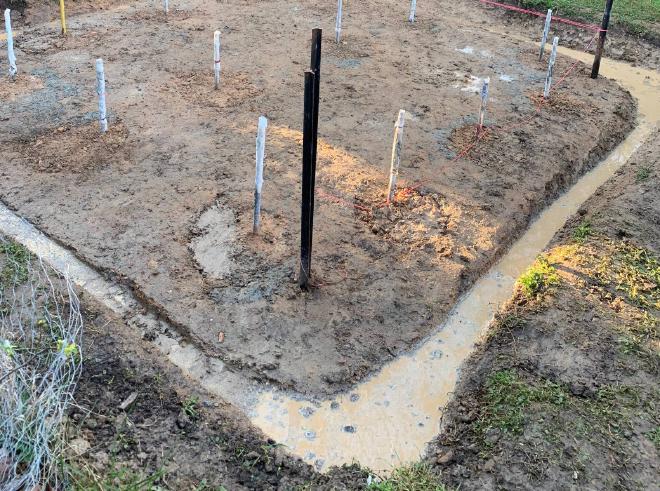
The low point is at the bottom of that image. Not visible is a large drainage outflow pipe filled with gravel.
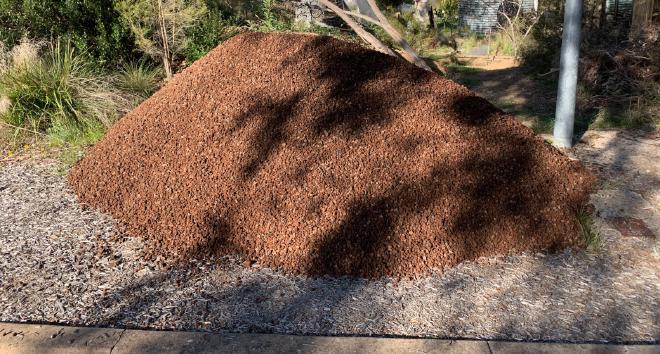
The whole site was later covered with gravel. I went with Scoria, a porous volcanic rock. Not river gravel because mining rivers is horribly damaging.
Concreting #
It was slightly cheaper than mixing bags of concrete - and much easier - to get a truck delivery. The 0.5 cubic metres I ordered wasn’t quite enough so I topped it up with half a dozen bags.
The rods were covered over with plastic bags to keep the threads free of concrete. With the concrete in, we
- tamped down the anchors to remove air pockets
- positioned the rods at the string line
- made the rods plumb (vertical) using a plumb bob
They didn’t need support while the concrete set; the concrete was thick enough to hold them in place.
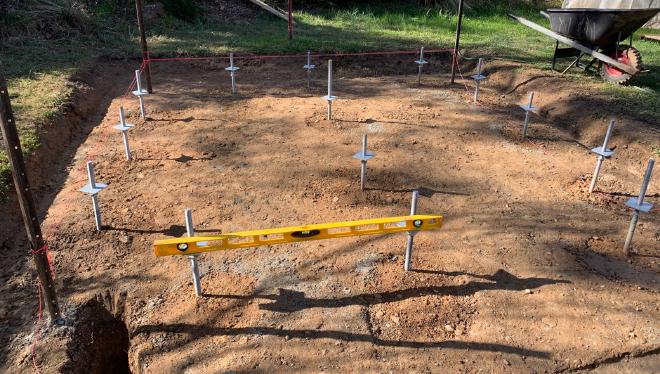
Levelling #
Now the fun part. Getting the beam supports all level was easy. It’s just a matter of setting one to the right level, then adjusting the next to match using a spirit level balanced between them. There are 2 nuts under each square washer. Once all were correctly aligned, I went around and tightened the lower nut hard up against the upper net to lock them in place.