Windows

Table of Contents
The Pea Hut - This article is part of a series.
Windows suck energy #
I’d learned in my work modelling houses for energy ratings, that windows are usually the weakest point in any house design. And that few people are aware of how much energy is going straight out through their windows.
Both the glazing and frame parts are important.
Glazing performance depends on the number of air gaps (i.e. number of layers of glass), any non-conductive gas filling the air gaps, and any special coatings on the glass. For a cool climate this would be a clear low-emissivity coating.
Frame performance depends on the material and how well it seals against air leakage.
- Aluminium and steel frames
- are extremely conductive, so can transfer as much heat as the glass even with a smaller area.
- Timber frames
- are quite good insulators. The downside of timber is that it requires regular maintenance and can warp over time to create air leakage.
- uPVC frames
- are good insulators like timber, require no maintenance, and seal extremely well. It is the most common frame material in most of Europe. One consideration is that the frames are wider than other types.
Chosen specs #
My design has three windows (yes the door counts as a window):
- North-facing door
- 960mm wide x 1795mm high
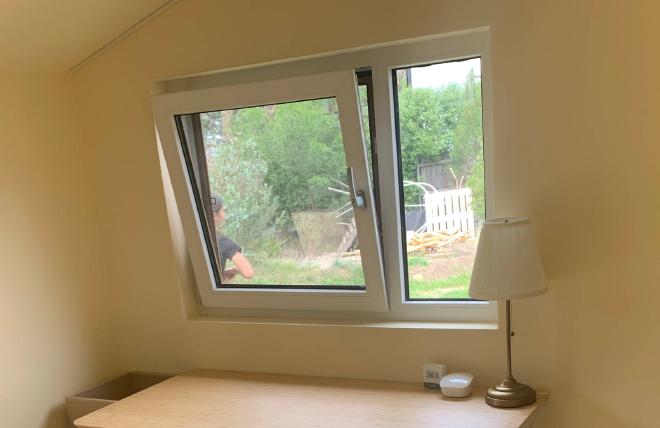
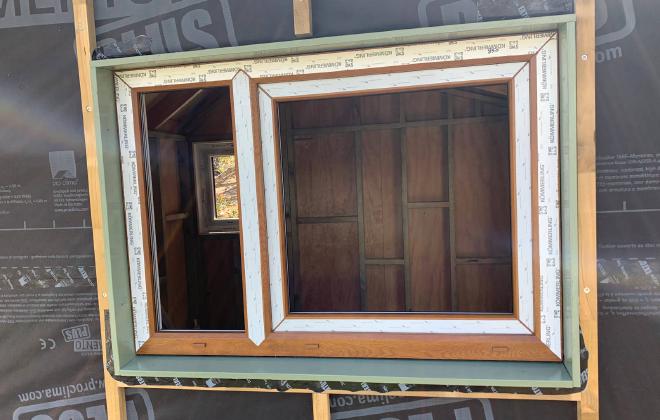
- East-facing window
- 850mm opening part (tilt-and-turn) and 400mm fixed part; both 865mm high
- West-facing window
- 765mm wide x 795mm high opening (tilt-and-turn)
These measurements are for the window frames; the structural framing allows 50mm extra for trim and installation.
I went with a local supplier of uPVC windows, Malplas. The 3 windows cost $4954 total. I paid a bit more for installation of the frames, but if I did it again I would do the installation myself.
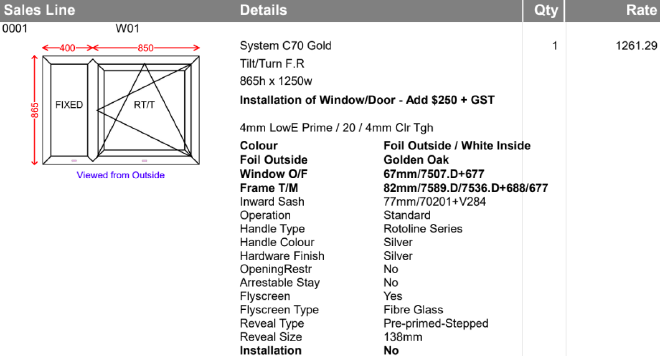
They are double-glazed with these layers:
- 4mm Low-E Prime Toughened glass
- 20mm Argon-filled gap
- 4mm Clear Toughened glass
The U value - a measure of heat conductivity - for the window system including glass and frame is 1.9. That’s good for a window, by Australian standards, though it still lets about 5 times as much heat through as a decent wall. The glazing part has a U value of 1.7, which is almost as good as it gets for double glazing.
The SHGC value - solar heat gain coefficient - measures how much any sunlight hitting the window will be able to heat up the room. The glazing here has a SHGC of 55% (as a percentage of pure sunlight’s heating power). That is lower than I would normally recommend for Canberra, but in this case there is east and west facing glass so it is vulnerable to overheating.
Installation #
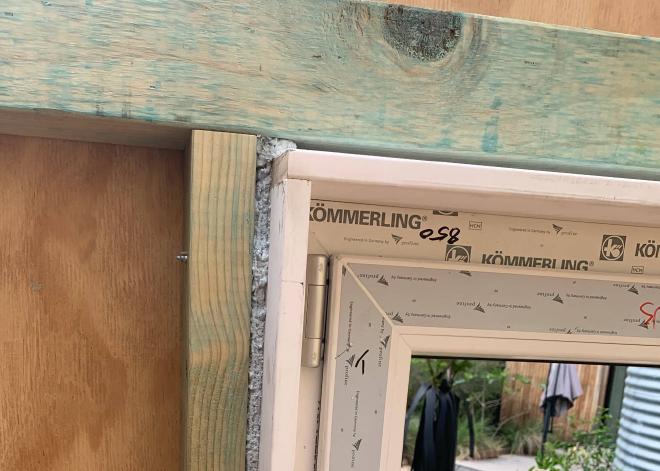
Installation of the frames was just a matter of getting them level within the rough opening, adjusting the reveal to line up with the plasterboard later (i.e. 45mm inside), then screwing it in place. The small gap left was filled with insulating low-expansion foam.
Finishing #
Jumping ahead in the series here…
On the outside, nothing else was done until the external wrap was in place. Then battens were placed around the window sides and bottom, in line with the structural frame. These would act as supports for the window trim, as well as for the weatherboard cladding. The bottom batten was positioned down slightly so that the sill would slope down for drainage.
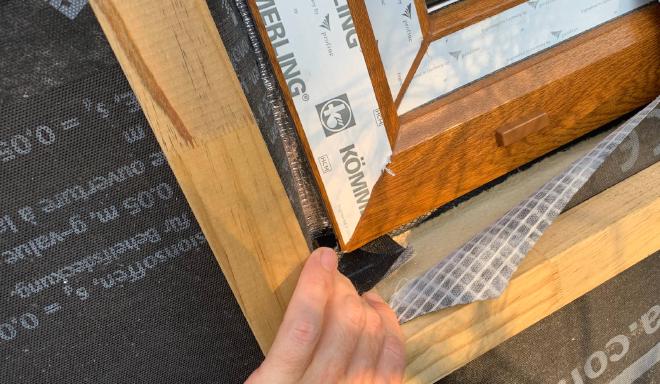
Before the trim, I needed to install flashing tape to protect the structural frame from any water intrusion, as well as to complete the external airtightness layer. The tape must attach to the edge of the window frame.
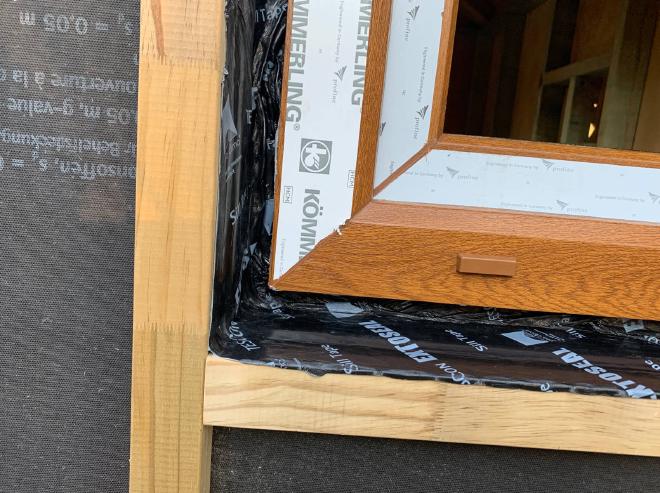
The trim was H3 treated pre-primed pine, 110 x 18 mm, painted Pale Eucalypt and screwed in place.
The depth of the trim was designed to line up with the weatherboards.
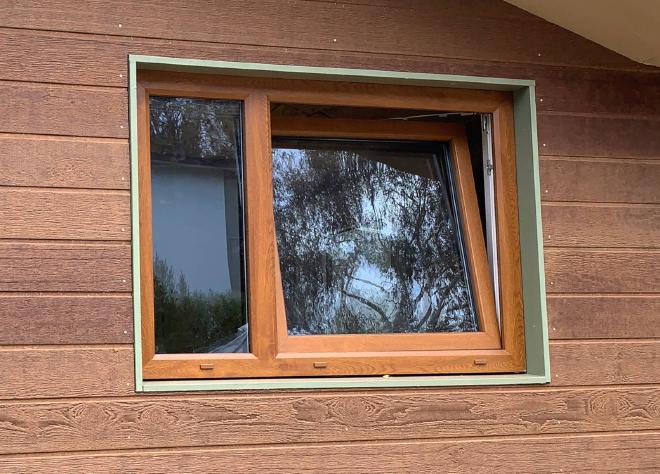
And the reveal on the inside was designed to line up with the plasterboard, so that it could be plastered over and did not need an architrave.